
Making of Reverse Flash Pt 1 – Resources, Shopping and Print List
Prelude (You can skip this part if you just want to get to the shopping and print list)
A long log time ago, I saw a video from Maker’s Muse (You should watch him if you are interested in learning more about 3D printing) talking about the kickstarter for the 101 hero and I decided to back it. From the build specs, the printer did not look like it was going to be top of the line, but it was a large step in the 3D printing community. This was going to be a simple to assemble 3D printer at a fairly low price tag. Super Early Bird was $49 plus shipping! I missed the Super Early Bird special, but still decided to back them to get 2 of these printers. The process took forever, and I had just about forgotten about them until they showed up (over half a year late, but they showed up).
By this time, I had watched video after video of unboxings and disappointments, so I already knew what to expect out of this printer. To my amazement, it was super simple to assemble! It took about 8 minutes to build as opposed to my FolgerTech i3 that took about 6 hours. The plastics were injection molded as promised and the components were super cheap as expected. I turned it on and put my first file to print, the first 5 layers looked AMAZING! of course those first 5 layers also took almost an hour. This printer (in stock config) tops out at a whopping 15 mm/s (20 if you really want to push it). After the 5th layer, I got massive underextrusion and then my makeshift spool holder (a coat hanger dangling precariously on a small Ikea spice rack above the hero) got flimsy and the spool jammed up. It was then that I got really serious about upgrading it since it will be in my wife’s 2nd grade classroom and I didn’t want the kids to get bored about the printer and excited about paint drying.
We must do RESEARCH!
Having built 3 prusa i3 variants, I feel I have a good grasp on 3D printing hardware and cartesian printers, but this is a delta and this is my first experience with delta printers. Here is the journey I went through to understand them more.
The first person I started paying attention to is WorkShop Tinkerers (I’m linking to his channel because he shows his full journey). WST assessed the strengths and weaknesses of this printer and didn’t decide to discard the project. He actually stuck with it and make something with it. His videos will get you through to a useful 3D printer in the 101 hero.
Second, as I was following the kickstarter comments while I waited for my printers to arrive, I noticed mention of the 101 hero (unofficial) facebook group. Being part of a few 3D print groups in Facebook, I knew this is where I needed to be to learn more. I read post after post on the group to grasp an understanding of the struggles people were facing and what they were doing to rectify them.
Third, I found the instructables for the 101hero upgrade story which is where I pulled many of my resources from. This instructable is pretty comprehensive and leads you to many of the links required and parts to print.
Let’s go shopping!
Now I had my resources together and coupled with my prior knowledge of 3D printing, I started adding parts to my cart. I could have gotten my cost down by ordering overseas, but I was on a tie crunch to get this printer deployed to my wife’s classroom. (The links below will be based on what I actually purchased, so feel free to find some cheaper options)
Ramps 1.4 Kit that includes the full graphic LCD, Stepper Drivers and Ramps/Shield combo: $27.39
12V 15A 180W Power Supply: $12.36
Metal J-Head V6 Bowden Style Hotend: $11.62
Lot of 5 NEMA 17 Stepper Motors (You only need 4): $35.00 (USED)
Lot of 10 Stepper Motor Lead Wires (You only need 4 if your motors did not come with them): $10.99
6ft 18 AWG Universal Power Cord: $5.24
M3 Screw Set (I already had this set and it has been lasting me for over a year): $13.99
1KG PLA 3D Printing Filament (This just happens to be the latest spool I bought): $14.59
Parts to print! (This will require access to a working 3D printer)
E3D V6 hotend holder: Printed at 60 mm/s with 20% infill, 215° Hotend 70° heated bed PLA
101hero NEMA17 Upgrade: (I only used the tower motor mounts from this, but it has an extruder too): Printed at 60 mm/s with 20% infill, 215° Hotend 70° heated bed PLA, Supports touching bed only
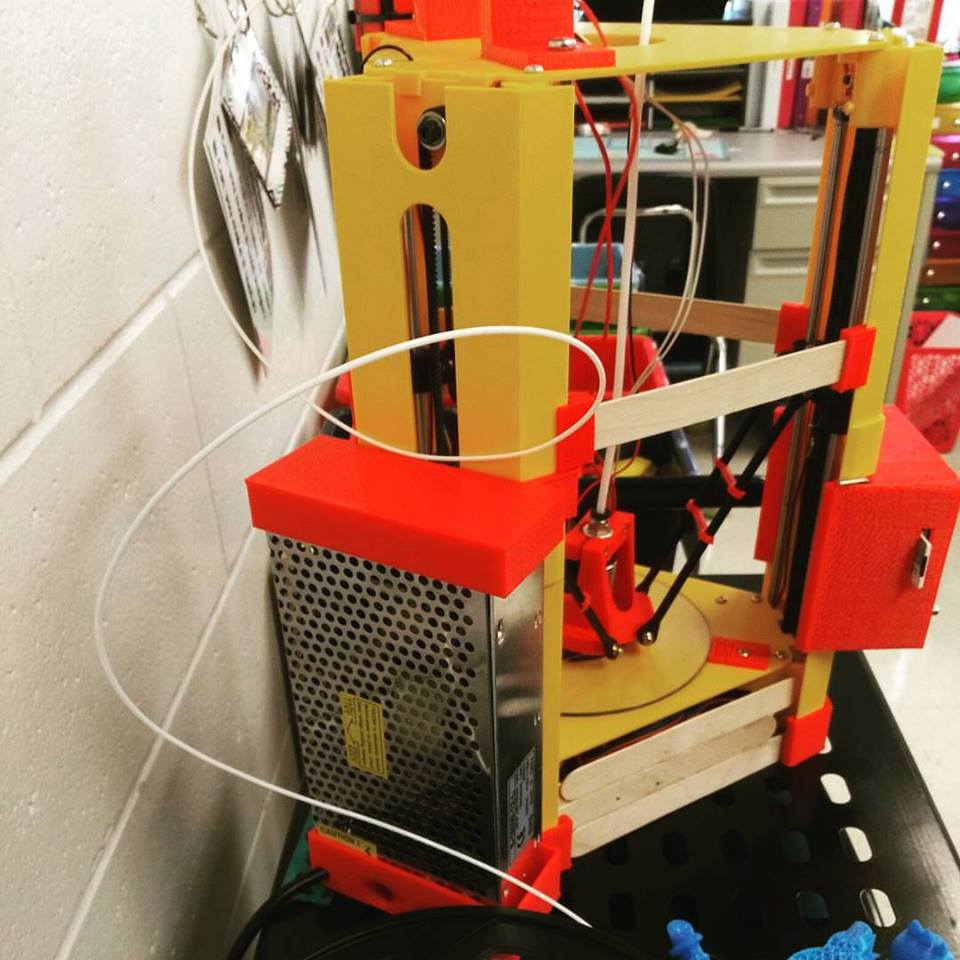
101Hero spool holder: Printed at 60 mm/s with 20% infill, 215° Hotend 70° heated bed PLA
101hero – holder for glass plate: Printed at 60 mm/s with 20% infill, 215° Hotend 70° heated bed PLA
Rod tensioner for 101hero: Printed at 60 mm/s with 20% infill, 215° Hotend 70° heated bed PLA
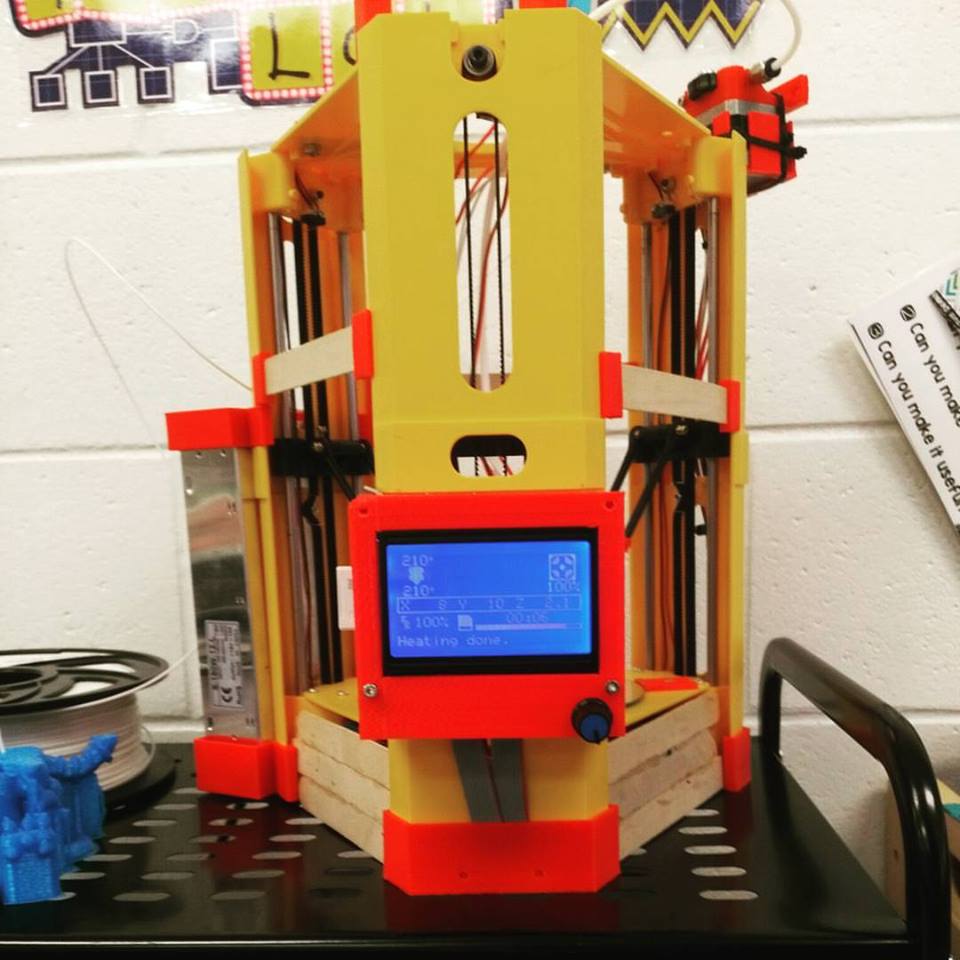
101Hero Lolly Stick Pylon Brace Reinforcement: Printed at 60 mm/s with 20% infill, 215° Hotend 70° heated bed PLA
101Hero Bowden Extruder Mount: Printed at 60 mm/s with 20% infill, 215° Hotend 70° heated bed PLA
LCD Holder, PSU Holder and Bottom Mounts (These may require a larger printer at the moment, but I will try to release an updated version to fit the hero): Printed at 60 mm/s with 20% infill, 215° Hotend 70° heated bed PLA Supports everywhere for the LCD Holder