101 Hero to 101 SuperHero – Building Reverse Flash Pt 1

Making of Reverse Flash Pt 1 – Resources, Shopping and Print List

Prelude (You can skip this part if you just want to get to the shopping and print list)

A long log time ago, I saw a video from Maker’s Muse (You should watch him if you are interested in learning more about 3D printing) talking about the kickstarter for the 101 hero and I decided to back it.  From the build specs, the printer did not look like it was going to be top of the line, but it was a large step in the 3D printing community.  This was going to be a simple to assemble 3D printer at a fairly low price tag.  Super Early Bird was $49 plus shipping!  I missed the Super Early Bird special, but still decided to back them to get 2 of these printers.  The process took forever, and I had just about forgotten about them until they showed up (over half a year late, but they showed up).

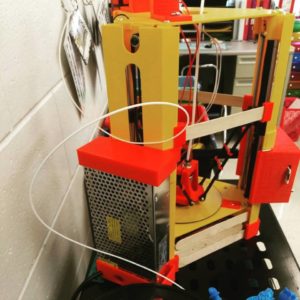
By this time, I had watched video after video of unboxings and disappointments, so I already knew what to expect out of this printer.  To my amazement, it was super simple to assemble!  It took about 8 minutes to build as opposed to my FolgerTech i3 that took about 6 hours.  The plastics were injection molded as promised and the components were super cheap as expected.  I turned it on and put my first file to print, the first 5 layers looked AMAZING!  of course those first 5 layers also took almost an hour.  This printer (in stock config) tops out at a whopping 15 mm/s (20 if you really want to push it).  After the 5th layer, I got massive underextrusion and then my makeshift spool holder (a coat hanger dangling precariously on a small Ikea spice rack above the hero) got flimsy and the spool jammed up.  It was then that I got really serious about upgrading it since it will be in my wife’s 2nd grade classroom and I didn’t want the kids to get bored about the printer and excited about paint drying.


We must do RESEARCH!

Having built 3 prusa i3 variants, I feel I have a good grasp on 3D printing hardware and cartesian printers, but this is a delta and this is my first experience with delta printers.  Here is the journey I went through to understand them more.

The first person I started paying attention to is WorkShop Tinkerers (I’m linking to his channel because he shows his full journey).  WST assessed the strengths and weaknesses of this printer and didn’t decide to discard the project.  He actually stuck with it and make something with it.  His videos will get you through to a useful 3D printer in the 101 hero.

Second, as I was following the kickstarter comments while I waited for my printers to arrive, I noticed mention of the 101 hero (unofficial) facebook group.  Being part of a few 3D print groups in Facebook, I knew this is where I needed to be to learn more.  I read post after post on the group to grasp an understanding of the struggles people were facing and what they were doing to rectify them.

Third, I found the instructables for the 101hero upgrade story which is where I pulled many of my resources from.  This instructable is pretty comprehensive and leads you to many of the links required and parts to print.


Let’s go shopping!

Now I had my resources together and coupled with my prior knowledge of 3D printing, I started adding parts to my cart.  I could have gotten my cost down by ordering overseas, but I was on a tie crunch to get this printer deployed to my wife’s classroom. (The links below will be based on what I actually purchased, so feel free to find some cheaper options)

Ramps 1.4 Kit that includes the full graphic LCD, Stepper Drivers and Ramps/Shield combo: $27.39

12V 15A 180W Power Supply: $12.36

Metal J-Head V6 Bowden Style Hotend: $11.62

Lot of 5 NEMA 17 Stepper Motors (You only need 4): $35.00 (USED)

Lot of 10 Stepper Motor Lead Wires (You only need 4 if your motors did not come with them): $10.99

6ft 18 AWG Universal Power Cord: $5.24

M3 Screw Set (I already had this set and it has been lasting me for over a year): $13.99

1KG PLA 3D Printing Filament (This just happens to be the latest spool I bought): $14.59


Parts to print! (This will require access to a working 3D printer)

E3D V6 hotend holder: Printed at 60 mm/s with 20% infill, 215° Hotend 70° heated bed PLA

101hero NEMA17 Upgrade: (I only used the tower motor mounts from this, but it has an extruder too): Printed at 60 mm/s with 20% infill, 215° Hotend 70° heated bed PLA, Supports touching bed only

101Hero spool holder: Printed at 60 mm/s with 20% infill, 215° Hotend 70° heated bed PLA

101hero – holder for glass plate: Printed at 60 mm/s with 20% infill, 215° Hotend 70° heated bed PLA

Rod tensioner for 101hero: Printed at 60 mm/s with 20% infill, 215° Hotend 70° heated bed PLA

101Hero Lolly Stick Pylon Brace Reinforcement: Printed at 60 mm/s with 20% infill, 215° Hotend 70° heated bed PLA

101Hero Bowden Extruder Mount: Printed at 60 mm/s with 20% infill, 215° Hotend 70° heated bed PLA

LCD Holder, PSU Holder and Bottom Mounts (These may require a larger printer at the moment, but I will try to release an updated version to fit the hero): Printed at 60 mm/s with 20% infill, 215° Hotend 70° heated bed PLA Supports everywhere for the LCD Holder

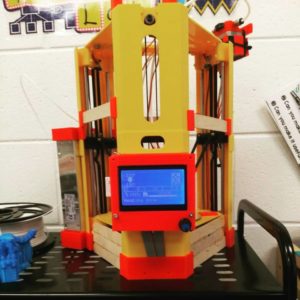
This is all I have time for on the write-up at the moment, but I will continue with part 2 shortly and link it here as well!

Ciclops 3D Scanner Project

When I started my new job, I found that the owner of the company has a 3D printer as well, but he never took it out of the box because he wanted to get his Ciclops 3D scanner working properly first.  It was placed into my care to see if I could calibrate and troubleshoot it.  I thought this would be a great thing to have around so I can scan… well, stuff.  My first scans came out awful and I found that this scanner relies a lot on perfect lighting and no reflections.

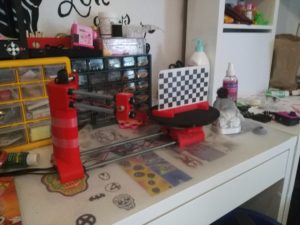
Here is the scanner on my desk:

Here is how the scanner works:  The checker board grid on the turntable is a calibration piece.  The Horus software picked up the grid and puts a pattern across it to determine distance and angle.  The scanner then uses lasers to show features and help judge distance and orientation.  After much calibration, I found that I could get this scanner to work with using only one laser.. the left one.

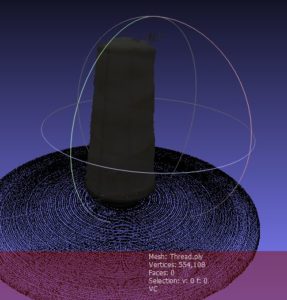
The scans using this came out pretty good.  Once scanned, you need to move the mesh file to MeshLab for processing and then you can export a printable STL or something to use in animation stuff.  Here is the scan in MeshLab:

I scanned a spool of thread since it has texture, shape and zero reflective surface.  It was pretty cool to watch, but I don’t think 3D scanning with this scanner is going to be my type of thing as I can model the majority of stuff I want to design from scratch and if I have it, I can buy it instead of scanning it.  I am glad to have had the experience with it though and I am also happy to be able to return it and get it off my desk this coming week.

Well, I’m off to unlock a room in my house… the final room that is not usable yet is our Cutting Room where I have our vinyl cutter and another workbench.  It’s going to be awesome to have the house 100% usable soon.  Updates on that project to come soon!

The Sword Project

We decided to start building some cosplay props based on our own ideas and designs and came up with a pretty awesome sword.  It only took a day to print everything out using all of our printers and assembly was quite easy… all the things we look for in a multi-part model!

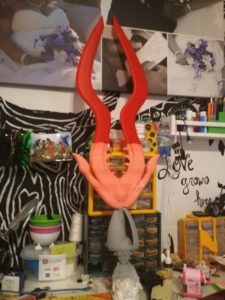
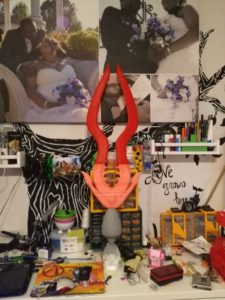
Here is what it looks like assembled (Please excuse the messy desk 🙂

Sword Front
Sword Back

Came out pretty sweet, light weight and the handle was angled properly (That was my biggest fear of having the sword angled so your natural slash would hit with the broadside instead of the sharp side).

I did some adjustments to it and then started working on the bond between the handle and the blade… then I broke the blade by accident… in 5 pieces!  I almost cried a bit as I stared at my shattered creation on the floor.  I picked up the pieces, carefully glued them back together and set out to go to work for the day.

2 days passed without me touching the sword out of far of breaking it and then I decided to clean my desk up and get a clear mind.  The sword was staring at me the whole time and I knew what I had to do…  I picked it up and flailed it around like a mad-man laughing maniacally as the pieces flew off of it.

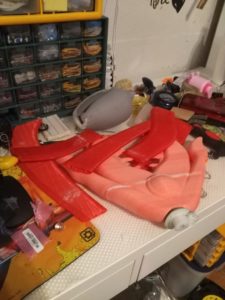
Here is the aftermath of my destruction

Why would I destroy it in this fashion?  I am building a prototype for others to use.  I can’t provide a product and then tell them only gently move it and don’t even bother posing with it because it will rattle apart.  Cos-players need to be able to pose,  swing, move and carry these items.

The other part to the destruction was to do a cross section analysis on the sword to see if it was my design that caused the weakness or the printing process.  I can happily say it was the printing process as my printer was under-extruding by about 20% due to some recent upgrades and firmware changes without double checking my e-step settings.  The bonded parts where I used dowels and CA glue were solid and the pink part printed on another printer was also pretty solid.

There you have it.  The Sword project phase 3 – Will it last?  The answer is YES, we can simply re-slice this with thicker walls, maybe 20% infill instead of 10% and re-print it to have a solid sword that can be carried, swung and posed with.  You can follow these projects on my instagram where I have much more content.

Thank you for reading!

My Ink Carrier

Looking back on life before I had a 3D printer, I realize the struggles I went through to create simple functional items.  I would have to carve them out of wood, or rivet soda cans together to bring my inventions out.  Now, it is as simple as designing what I want and printing it out!

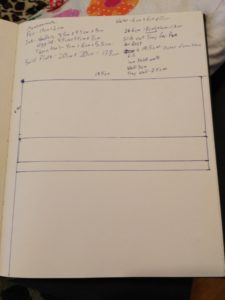
The first step I take to bring my designs to life is a quick sketch in my notebook so that I can jot down all of my ideas and what I want my design to do.  While doing this, I think about how my design can help improve my daily activity or my hobbies.  Recently, I got back into drawing with a dip pen when a fellow vendor at MaloogaCon showed me her solid glass dip pen (It blew my mind!).  Of course, I got one for myself and one for my wife and we use them daily now.  The problem for me is to lug around my dip pen, my water container and my inks.  I like to write with it too, so I take it with me to work and write down notes as I go through my day.  Here is a photo of my draft (It’s boring as I did’t sketch it out, I just wrote down parameters I needed)

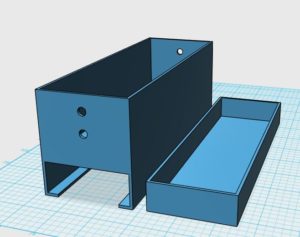
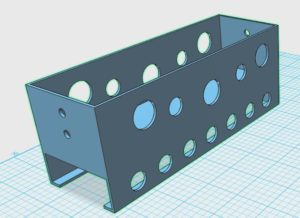
From there, I go to the 3D design software and build my model.  I primarily use 123D Design from AutoCad, but Tinkercad.com is a great tool as well.  For this model, I used 123D Design.  From my sketch, I knew that my carrier for my inks and pen needed a wall thickness of 2mm and it needed to be 195mm long, 65mm wide and a total of 80mm tall.  This design also required a pull out tray where my pen would be stored in the bottom, so I translated all of my measurements and left some extra space for the tray to slide nicely (always leave a bit of room for moving parts based on your printer’s tolerances).  Here is what transpired:

Now, I went to my slicer program (Cura) and let it calculate how long this beast would take to print.  This particular print will take 9 hours and 50 minutes to print and will consume approximately 178g of filament.  I decided to take a little bit more weight off of it to add a design element to this box.  It needed a bit more design work to fit what I wanted, so I created a V2 of it here:

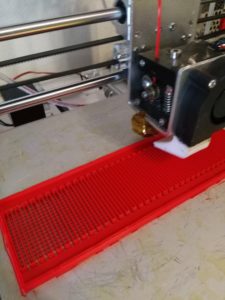
By adding the holes to the main body, I was able to shave about 8 grams and 20 minutes off of my print.  Now, it was on to printing this.  Now that I have these holes in it, why not print with 2 separate colors?  I am now printing the main body in Red and the Pen Tray in Black to give a nice 2 tone effect.

There was a crack, then a snap

The Ugly – When prints fail

We have been working on a custom designed sword project that I completed the model for yesterday.  The handle has been printed already, so I started on the blade yesterday… a 20+ hour print.  Lately, I have been prototyping with a cheap roll of ABS (More on that later) and I have had some fairly good results.  I started the print around 10 AM yesterday and hoped to wake up to at least a nearly finished product this morning.


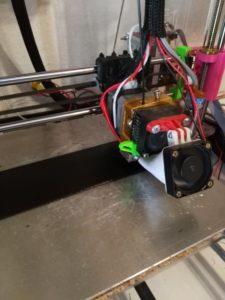
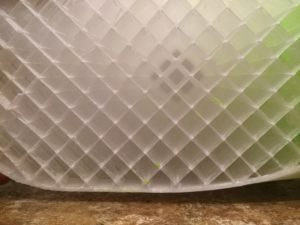
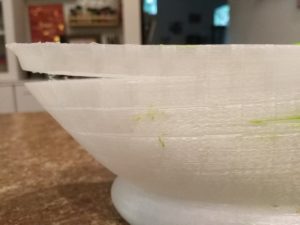
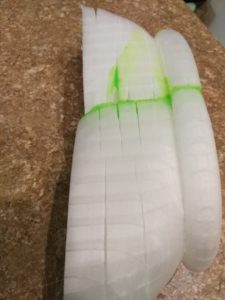
Instead, I was startled awake by a crack, a snap and then some dragging noises.  Fearing the worst, I jumped out of bed at 5AM and ran to the print room.  I thought the print had popped off the bed as sometimes ABS will contract while cooling and pop itself free.  This time, it stayed on the bed, but had such crazy layer separation that the layers popped up and got snagged by the hot-end.  Here are some fun photos to show you.  Ignore the green… I wanted to test fit some stuff before committing to another print job.

So… why did it fail, you ask?  What could have caused such crazy layer separation?  It is a combination of things, actually.  Let’s start with the plastic type used for the print.  I used ABS plastic on this.  ABS is awesome for getting intricate details and for it’s structural integrity.  The plastic has a bit of a flex to it, so it can take an impact without shattering.  Sounds awesome, right?  ABS’s largest strength is also it’s largest downfall when it comes to 3D printing.  With all of those properties, the plastic shrinks a bit when it is cooling, hence the finer detail.  As the plastic is shrinking, if layers cool at a different rate from each other, warping and splitting can occur.  This is fairly easy to combat though.  If you build a chamber around your printer (even a box will work) you can mitigate this effect by shielding the print from ambient air.  Now, let’s look at the quality of the plastic I used.  This spool of plastic was $12 for a kilogram on Amazon!  I know, right?  I love how this plastic prints with small parts and actually printed a few hand-spinners with it.  The downside is that it is very weak.  I spilled some isopropyl rubbing alcohol on one of my hand-spinners and it just about exploded!  The plastic became super brittle and disintegrated in my hands (photo below).  I don’t know what was blended in with this to make it so cheap, but make sure for high quality prints, you use high quality plastics.  Notice, I didn’t say expensive, make sure you try out many different brands and types of plastic.  You never know when you will find a favorite cheap one!

This print broke apart when isopropyl alcohol fell on it

The good news is that when I created this sword, I created it too thick and the dimensions don’t feel quite right to match the handle design.  This failed print is allowing me to go back and redesign without losing 3 days of print time.

New ideas!

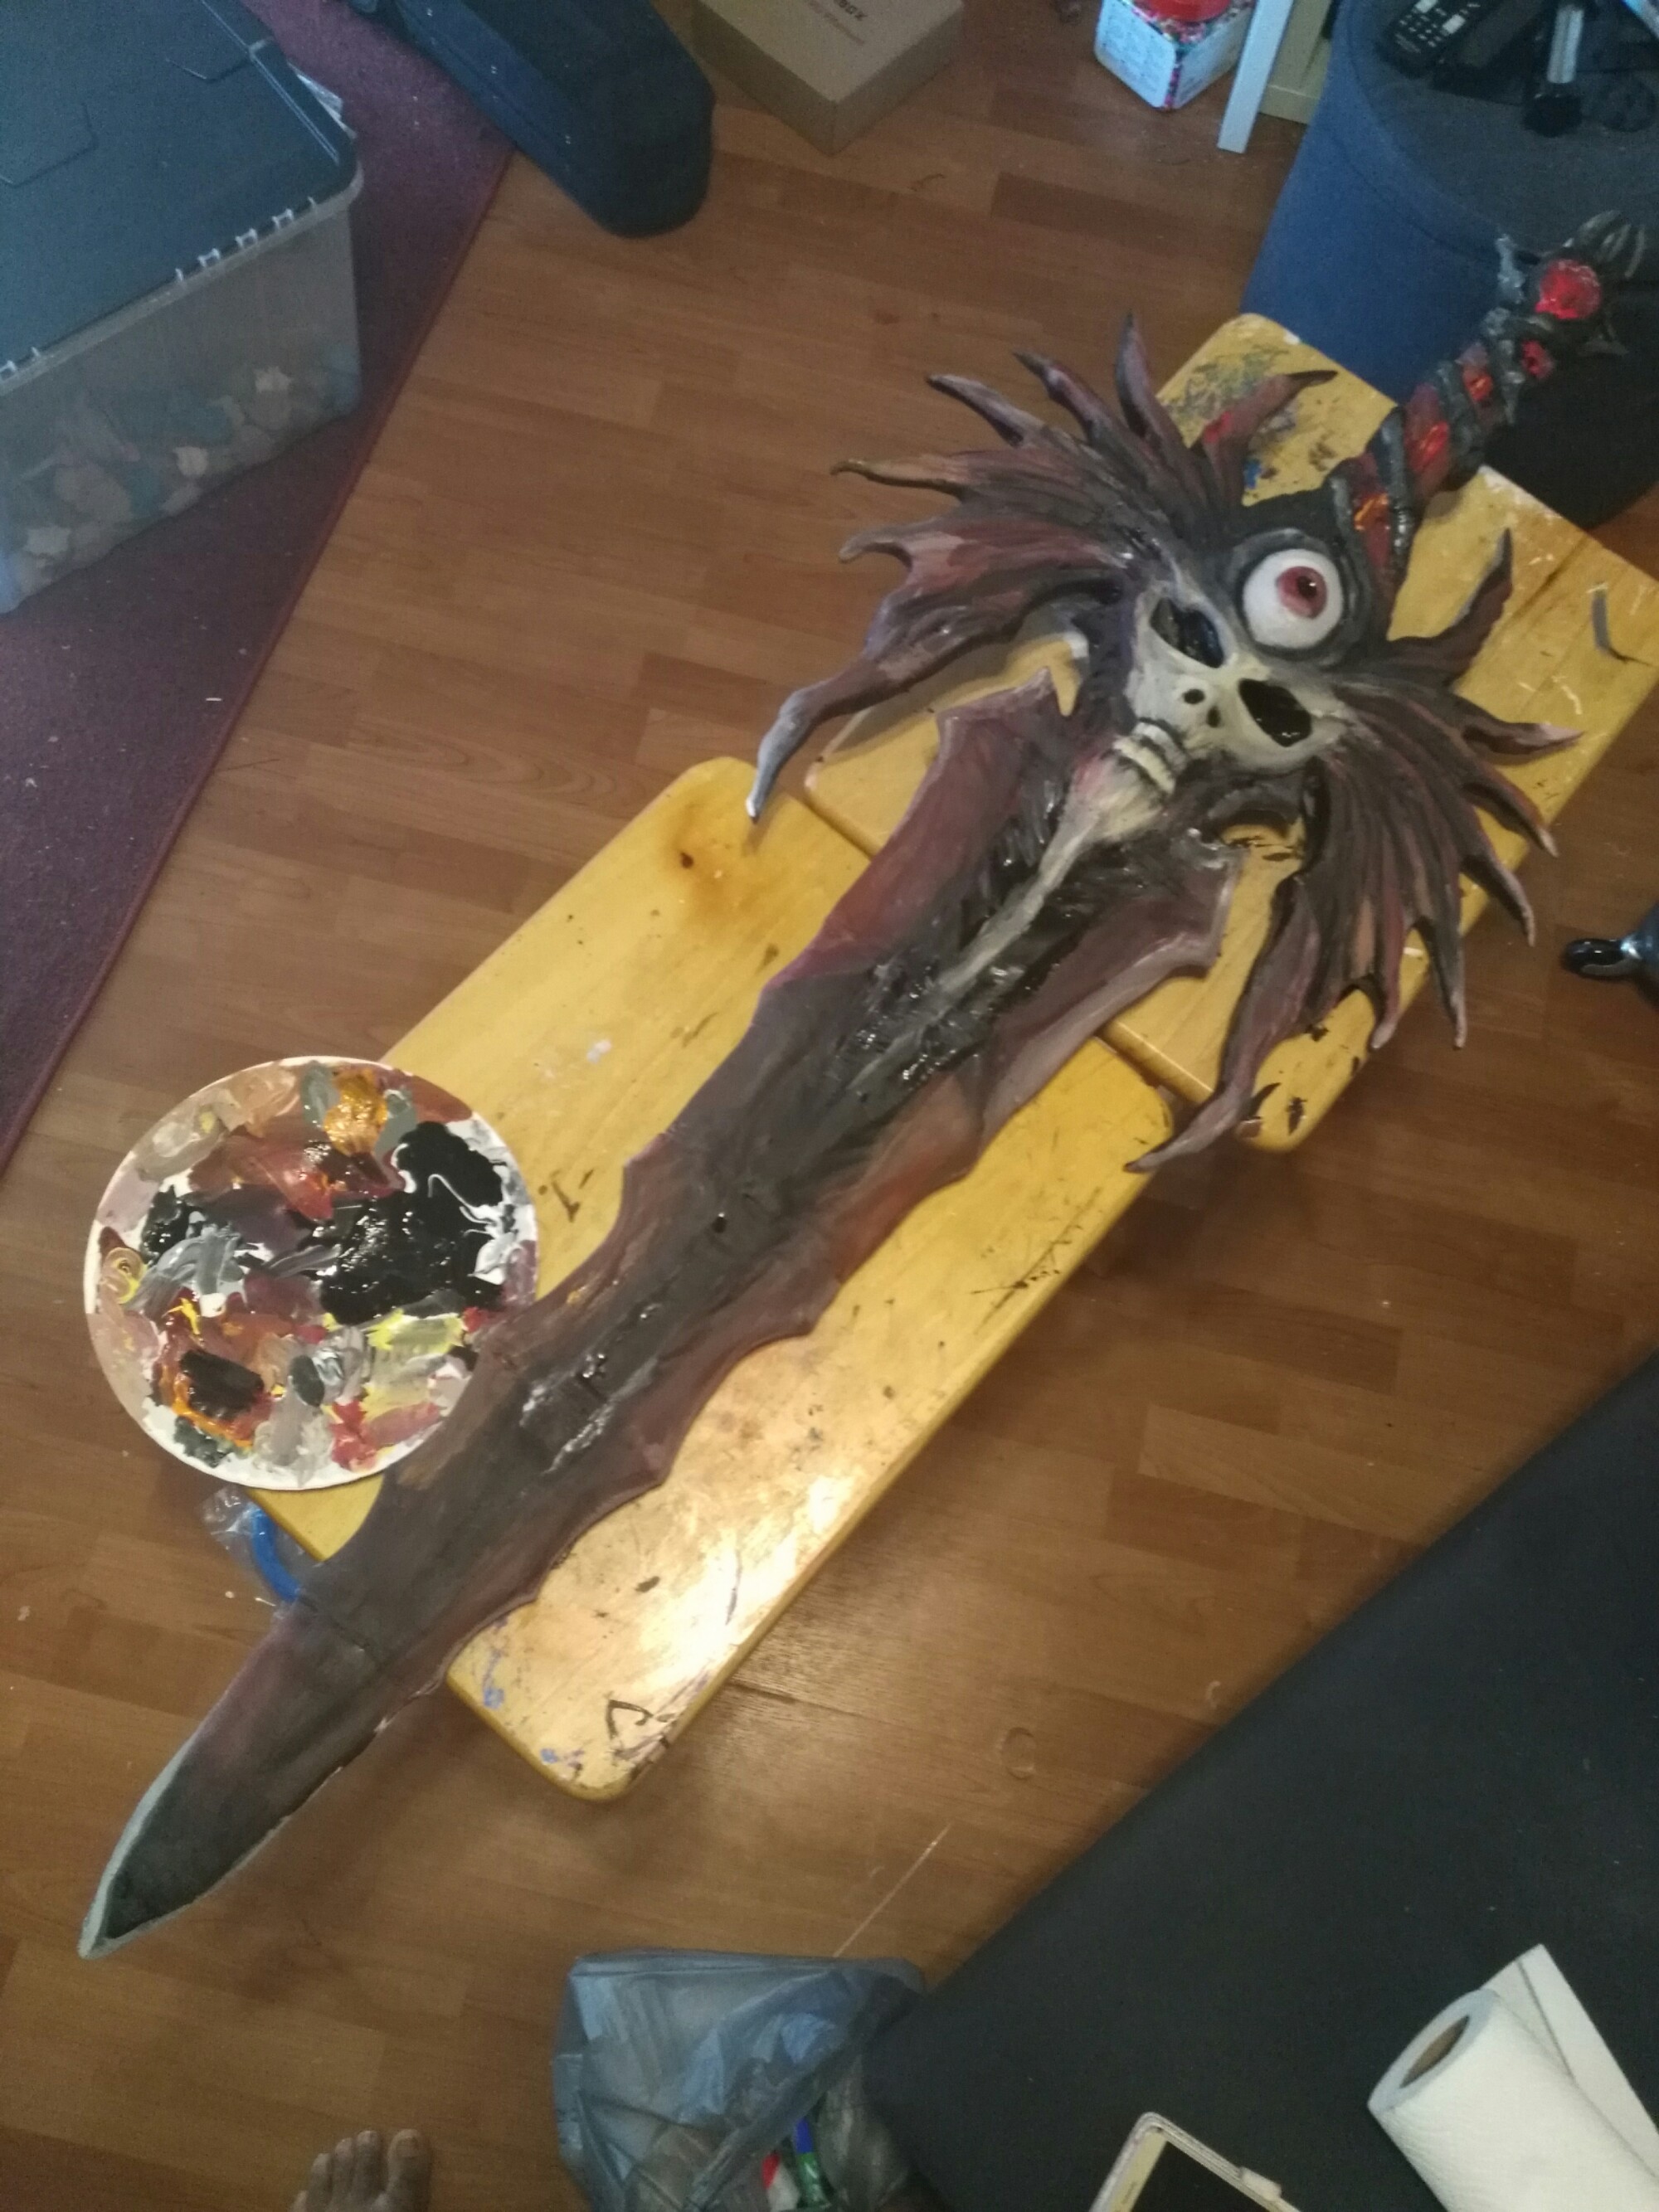
Now that MaloogaCon 2017 is over, we want to work on our cosplay portfolio by making awesome props.  We have been toying with the idea ever since we printed the Soul Edge sword from MyMiniFactory.com.

I printed it out in 2016 for a Halloween costume and my wife did the painting and detail work on it.  Since then, people have been requesting that we sell it to them, but we cannot do that in good conscience with it being someone else’s design.

Now we are going to create our own digital files of weaponry and armor that we can customize to fit our customers.

Stay tuned for more updates on this!

MaloogaCon 2017!

We are at MaloogaCon 2017!

This is our first large convention we are attending and vending at!  Our booth is under my wife’s company, Blossoms of the Heart.  You should visit her site at BlossomsoftheHeart.com!


We are so excited for this opportunity and I thought it would be a great opportunity for me to start a blog about 3D printing and home life.  I remember when I first started with 3D printing, I didn’t know what to do or where to go.  There was a lot of research to do and a lot of misinformation was out there.


I hope to have some great tips coming out about 3D printing and maybe even some stuff about making Salsa… afterall, that is what started this crazy adventure!


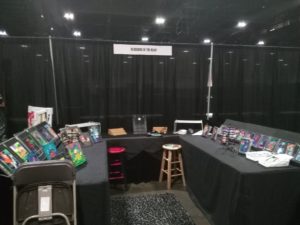
Here is our booth barely set up:

Blossoms of the Heart